DIY Crafts for Thanksgiving
Via Good Housekeeping
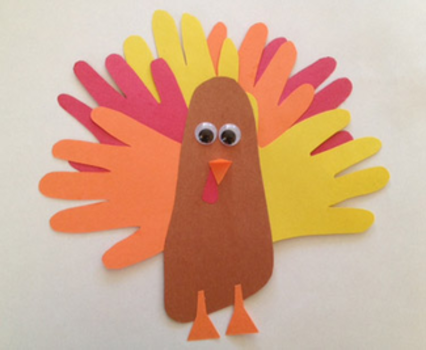
Hand Turkey
Supplies:
A piece of each color construction paper: red, orange, yellow, green, blue, purple, white, black and brown.
Scissors
Glue
Steps:
- Body: Take the brown construction paper and cut out two connecting circle shapes, top smaller than the bottom.
- Feathers: Trace your hand on each of the remaining pieces of paper, then cut out.
- Glue the hands to the back of the body.
- Eyes: Cut two small circles out of the white paper, then cut two smaller circles out of the black paper. Glue the black circle onto the white circle
- Using the remaining orange paper, cut out a small triangle (beak) and leg like shaped (see above image for reference), and glue them on
- Finish off your turkey by cutting out a curved oval-like shape for under the beak, and glue it on
Felt Pumpkin
Steps:
- Cut off the end of the Styrofoam ball so that the sphere will sit up straight.
- Pierce ball with the stick straight down the center.
- Cut a leaf shape out of the green felt, then using a pin, fold the end of it and attach it to the ball.
- Cut 64 3-inch circles out of the orange felt. Fold the circles in half twice and then pin through all layers to the ball at random
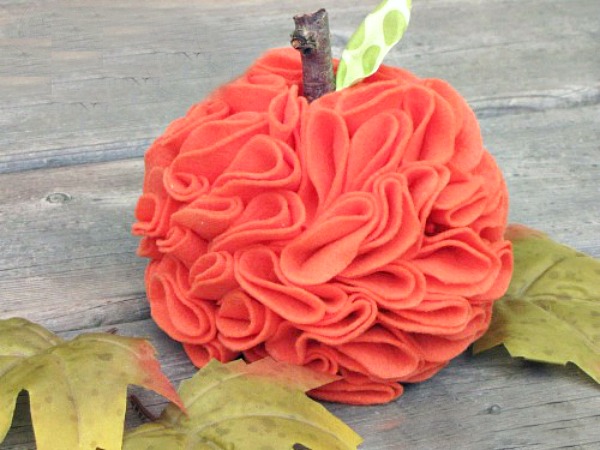
Image via Clean and Scentsible
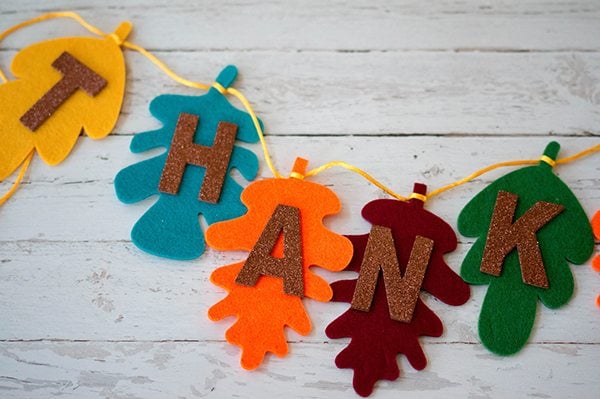
Leaf Pennant Garland
Supplies:
Felt
Glitter letters stickers
String or ribbon
Scissors
Steps:
- Cut out leaf shapes with a stem at the end to attach the string to
- Tie the string/ribbon to the end of the leaves
- Stick the letters onto the leaves. You can put any word, some examples are thanks and happy thanksgiving.